Showing posts with label Flowers. Show all posts

Friday, March 16, 2012

Pretty flowers make a pretty card!

I LOVE die cuts that come with matching stamps! This lovely set has it all...swirling floral plus three flowers. I  actually cut the heart edging first, another new toy! I love the fancy ooh la la look!


The card was then stamped with the swirling greenery, and then flowers added around the card.

The largest flower can stand on it's own. But the set has a separate die and stamp for the "inner" petals. Either way, they look just lovely. I added the red dots to the centers of each flower, matching the outer petals.

Adding a die cut of greenery wrapped around the tag kept the swirling floral look of the card in sync.


Accessories: Sizzix stamp and die set, Marvy Uchida interchangeable edge punch, pastel card stock.


Photobucket

Sunday, March 4, 2012

Glossy and pretty!
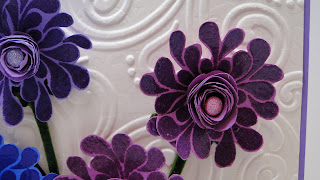
These pretty colors say spring is coming! I was inspired to brighten up some flowers after touring one of my favorite shops...Simple Pleasures. I like the glossy flowers and bright colors on this one.


The centers for these gem like beauties are made with Sizzix's 3D blossom die. Mine didn't quite look like the one on the package...oh well.
Regular card stock paper is stiff, so I switched it out and used colored paper instead. It does wrap up easier, but could also be the difference in my flower and the one Sizzix advertises.


The stems were made from the Field Flower set by StampIn' Up. Green embossing powder was first applied, then the stems cut out...a little tricky since they are very thin. Make two.

Next, cut the centers using the Sizzix die, roll up and secure with glue. I poured glue down the centers, and used glue dots on the back. A sparkle brad was pushed down into the centers...such a pretty way to glitz up these flowers, and they went well with the glossy finish.

Now make the backs to the flowers, using the same colored paper. Clear embossing ink was used on the flower stamp, which let the color shine through. A single cut to the center, then fold the flower slightly over and glue to make it 3D. Use a glue dot to attach the center to the backs, and more glue dots to attach the completed flower to the card.
A double embossed background was made using already embossed card stock, then embossing again. This one is made with Intricate Floral.

The tag is just two layers, with added sparkle brads...of course. And a bow...bows and flowers just naturally go together!


Accessories: Sizzix 3D flower die, Intricate floral embossing folder, Field Flowers Stamp set, flower stamp for the background, sparkle brads, tag punch, ribbon, embossed card stock, colored paper, green and clear embossing powder, purple card stock.

Photobucket
Spring bouquet

Sizzix has a mini flower set which cuts five little flowers all at once. Nice...and so very handy.
I started out just experimenting with the cut shapes using some bright textured card stock.
Why waste the effort I thought to myself!


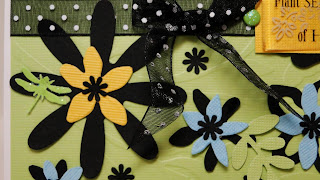
Once I got started it seemed using black to offset the bright petals worked nicely. So the layering was black, then a colored petal piece, topped with a black center.

The large and medium size flowers are made from punches of the same flower, just different sizes. They worked well with these Sizzix mini flowers.
The tag is clear and 3D, placed over black card stock. Sheer black pok-a-dot ribbon went perfectly with this frilly theme.
And, the bottom edging of scallops looked more like petals to me up against these spring flowers.

Add a few mini daisy flowers around the card, (the same punch used for the flower centers), to fill in any open space.
How could spring be spring without a couple dragon flies! These were cut from bright green sparkle paper. Two sparkling brads matched these flighty critters, and complemented the embossed green background.


Spring time makes bouquets a natural beauty!


Accessories: Sizzix flowers #4, Large and medium flower punches, dragonfly punch, brads, ribbon, scallop edger, bright card stock, sparkle paper, clear tag, Leafy branch embossing folder.


Photobucket
Pretty flowers make a pretty greeting...

And with the new set I received at Christmas, this card came together. It's simple design gives room for the flowers themselves to take center stage.


First I cropped the corners and added the green background. This cute corner punch was a new find, and on sale.

The green stems are stamped directly onto the card. Next time I'll try overlapping the stems.

The field flowers were stamped, then a couple were embossed. A matching blossom was made as background for the two taller flowers.


The tag followed the theme..."simple". A bronze ribbon at the bottom matched the embossing powder..

And with that, the card was complete.


Accessories: Field Flower stamp set, corner punch, Alleluia stamp, tag punch, ribbon, bronze embossing powder, green and white card stock.


Photobucket

Friday, March 2, 2012

Pretty Blue Madness...

My mother in law is in the hospital...still. When things turned a little crazy, and to me a little uncertain, I retreated to my card making room. Getting lost in a creative mode allowed some relaxation for my heart. A little worry, a lot of prayer...then this card. Can you see a little bit of anxiety here?


One cool tool recently was added to my punch drawer...and this card used the "star flower" in two colors.
The star flower is cut in two colors, then the small petals are aligned with the large petals. Once that was in place the top star was given added dimension by bending the petals upward.

The brown embossed background matched the paisley paper, using Cuttlebug's Stylized Flowers. A nice back drop for these flowers.


I used a smaller flower from the Delight in Flower set for the centers. One inked in brownish red, and one in blue. Both are attached with a red brad which compliments the tag.

Additional flowers were added to the card with tiny daisy centers (another punch) accented with red dots instead of a brad.


This little tag was made with another recent addition to my punch drawer. The punch has a triple function. You can actually move the tab on the front of the punch to cut one, two or three tags at one time. Cut different colors, add a brad, a ribbon,  and viola...here is a cute way to send the message to special people in my life.


Accessories: Cuttlebug Stylized Flowers embossing folder, punches for flowers and tags, brads,  ribbon and some fun paisley printed card stock.


Photobucket

Wednesday, February 8, 2012

I'm seeing RED!

Just the perfect color for February and Valentines Day...Red Red Red! And to finish off my Valentine extravaganza I used some fun stamps and embossing folder with a little extra RED added, of course!


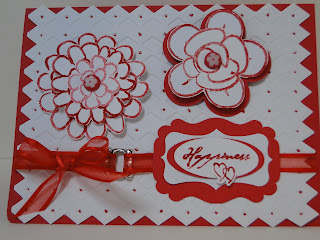
I loved the idea of highlighting the embossed background with a red pen, and then cutting out the edges for the ric-rac effect! The boarder makes the card!

Close up you can see the dots...Red of course. After embossing, I cut the edges out according to the pattern. Then I applied a red Stampin'Up pen and carefully gave each indented diamond a splash of RED.
The Red bow and silver hook added the special effect.


The two flower stamps are from the Flower Fest set.
This larger flower is made with 3 layers and the center was stamped in a lighter pink-red ink for highlights.

I found cute red flower brads for the centers.


This smaller flower has 3 layers too. The larger RED background is easily cut with the large flower punch...it matches the stamp set nicely.

The next two layers are stamped and cut, then fastened with another flower brad.


Add extra dimension to the flowers with foam sticky pads in-between their layers.


                                                                                                                                                                          The tags are finished off with with a quote from Simple Thoughts-Dogs and an extra set of RED hearts.


Accessories: Flower Fest Stampin'Up stamp set, Diamond embossing folder, large flower punch, red ribbon, flower brads and silver hook.


Photobucket

Friday, January 27, 2012

Well Hello Dolie!

This card combined two elegant features...the fancie large dolie stamp and a hand made 3D flower...it's a beautiful thing! The flower is stamped in white to add another layer of dimension and distinction.

Making the flower takes a little patience...and practice. Just look at the results~~the effort is worth the ooh's and ahh's.

There are a few trade tricks which make all the difference.


Start with 3 to 5 stamped & punched flowers. I had 5 on hand. Have your tools ready to progress through the next few steps with all the punched flowers.
Now turn the flowers upside down, LIGHTLY misting the unstamped side, and then running thru the FISCARS corrugator.
Lay the flower on a hard surface and "press" out the ridges with a straight edge tool, such as the Stampin' Up edger. This makes the paper more pliable.


The flowers need to be cut to the center. One flower is cut with no sections removed, one has one section removed and so on till there are 5 pieces.

The sections are now ready to assemble. I use medium glue dots to fasten the petals, and a small crochet needle to "roll" the edges.
                                                      
Start with the large petal. Overlap two petals so there are 4 petals and glue in place. Press the center point of the flower on a hard service to "flatten" the point. This will help the sections fit together and reduce the height of the flower.                                                                    

Continue the same process with each section. The last two sections are pretty small.  I used the crochet needle to roll the edges first on the two small sections, then rolled the pedals into shape working them with my fingers. Once I liked the look a glue dot held them in place.

Use the crochet needle to roll the edges on the larger sections. I cut the back center points off the smaller sections and pressed to "flatten" the center. A glue dot holds the cut area closed once flattened. Now the flower is ready to put together. Place a glue dot on the back flattened center of the 3 petal section and position into the largest section. Continue till all are fitted together.

Use the two uncut extra flowers for the base.
HINT: punch the center out of one of the extra flowers, and attach sticky backed foam before placing onto the other flat flower. This gives a little room for the center of the 3D flower to fit into. And the extra petals give the flower a nice full look.

*Use a rhinestone or other embellishment for the center if you like. This flower didn't seem to need it.


Accessories: Stampin'Up Triple Flower stamp & matching punch, Stampin"Up Dolie stamp, matching card stock and ink, ribbon, sticky backed foam, Friskars corrugator, various tag shapes.


Photobucket


Sunday, January 22, 2012

Bloom'n Blue and Sparkle too!


A lotta bling makes this bloom'n blue flower power greeting card extra special. I combined a few specific tools of the trade to get things started. Start with a combo from Stampin' Up to make the flowers with Triple Treat Flower stamp and right sized punch.
The punch makes the sparkle paper flowers, and the stamp does a nice job on the inner flower. Cut off the outer edge of the stamped flower to show off the sparkles.

Once the flowers are assembled the background is ready to make. For this card I used Spellbinders Flowers emboss/stencil for a letter-press effect. A matching blue ink pad pressed onto the stencil over white card stock created a beautiful background. Be careful when lifting the stencil...the ink smears easily.


These cuties are packed with style and glitz. The inner flower was defined using a dark blue pen on the dots. And, the silver brad matched the silver sparkle in the outer flower. Touch up the flourish with ribbon and a multi-layered tag.  I recently acquired the different sized tag punches which really make it easy.


I had a lot of fun creating this bloom'n blue card...and ya know, it turned out nice!

Accessories: Spellbinders Flower stencil, Stampin' Up Triple Treat Flower stamp & punch, Tag punches, ribbon & brads.
Photobucket

Sunday, January 8, 2012

Paper Blossoms

Every time I get to visit with my VERY talented SIL Wendy Weixler, she teaches me a fun trick...she is full of talent. There are several die cuts & punches which cut the paper for blossoms. But the real fun is making your own, even out of felt. The possibilities are endless.


The process has several steps. Breakdown the stiffness of the card stock by misting with water...lightly! Run it thru a Fiskars corrugator, then press out with a straight-edged tool.


The crochet hook works nicely to help "bend backwards" the petals for a realistic effect...try it on other flowers you make too!


I made up my own spring time flower version to practice with. The flowers have several layers of varying sizes, and colors. Cut to the center of a flower, and fold one petal over the petal next to it & secure with a glue dot. Each layer was made this way and glued on top of the previous layer. Sprinkle extra small centers around the larger petals.


Aren't these just to pretty for words! The cards were given extra pizazz with the butterflies...more on that in a minute.


I really like this easy method, my big fingers are able to manipulate one overlapping petal which gave me a sense of you-can-do-it!


This pink version was my best work so far on making 3D blossoms. The printed paper and varied-sized flowers with alternating card stock all came together.


Now for the fluttering butterflies. I used a punch, and a die cut. I also made two of each cut for a symmetrical effect. How nice is that! Doesn't it just make your little heart flutter...or not...it does mine!


Accessories: Sizzix die Butterflies & Tropical Paisley embosser 656796, Mc Gall Butterfly punch, Martha Stewart edgers, boarder punches, ribbon & various colored card stock, Stampin' Up Fabulous Phrases stamps.